Part 2 – Advanced Operations covers more complex topics.
Continue reading “Part 2 – Advanced Operations”Chapter 8 – User Permissions
It is important for each user to have their own login with a password only they know. Also, each user must be assigned a suitable Security Role which allows only those operations within their scope of work to be performed. This is especially important if you will be using webERP in a regulated or controlled environment.
The default (out-of-the-box) user permissions and security configuration will generally be sufficient to get you started. Eventually though you will want to create bespoke security roles and token assignments based on the structure, staff and relationships of your company.
The webERP security model is comprised of four components:
- Security Role
- Security Roles are user roles with assigned security tokens (each user role has it’s own security role, and more than one security role can have the same security tokens. The webERP system administrator can edit the default security roles and create additional roles if needed for more selective control.
- Each user (login ID) is assigned a Security Role.
- To edit the Security Role assigned to a user, click [Main Menu > Setup > General > Users Maintenance] and edit the desired user (as a security role Administrator user).
Don’t think of the access a specific user requires to do their job, instead think of the role or job they perform, then assign that role a “security role”, make them a member of it and provide the security role with the necessary access.
- Security Token
- Security Tokens are used by webERP to control access to a page.
- A Security Role is assigned one or more Security Tokens.
- To view or edit the Security Tokens assigned to a Security Role, click [Main Menu > Setup > General > Access Permissions Maintenance] and edit the desired role.
- Page Security Level
- Each webERP script is assigned a Page Security Level, which is a Security Token a user must have to be given access to run the script.
- To edit the Page Security Level, click [Main Menu > Setup > General > Page Security Settings] and edit the desired page.
- In-Page Security
- Pages (scripts) control the data, buttons and links presented according to any or all of the Security Tokens assigned to the Security Role of the user.
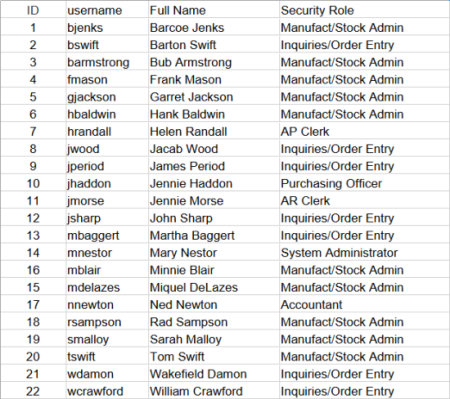
Users and assigned Security Roles
Default (out-of-the-box) Security Roles
- Accountant
- AP Clerk
- AR Clerk
- Inquiries/Order Entry
- Manufact/Stock Admin
- Purchasing Officer
- Customer (login only)
- Supplier (login only)
- System Administrator
SCC Employees and Security Role
The following organisation chart shows SCC employees with their assigned security role.
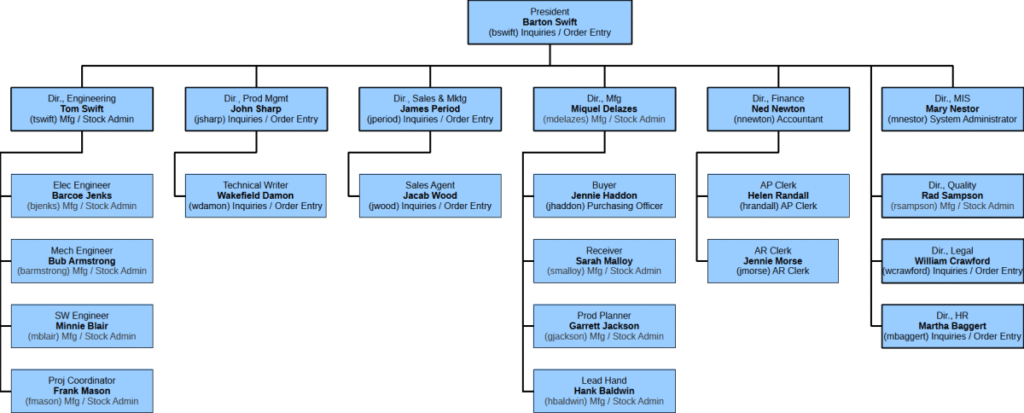
E.g. Miquel DeLazes > Security Role: Manufac/Stock Admin [Main Menu > Setup > General > Users Maintenance]
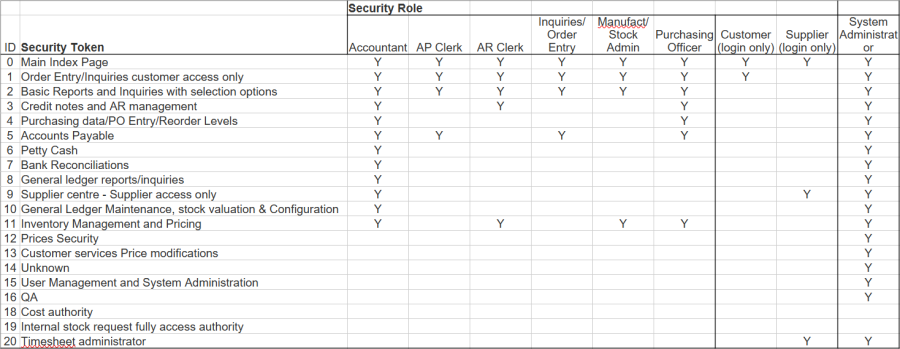
Security Roles and Security Tokens
Miquel Delazes, by being assigned the role “Manufact/Stock Admin”, is given security tokens 0 (Main Index Page), 1 (Order Entry/Inquiries customer access only), 2 (Basic Reports and inquiries with selection options) and 11 (Inventory Management and Pricing)
To create or edit a user Security Role: [Main Menu > Setup > General > Access Permissions Maintenance]
Examining the security role “Manufact/Stock Admin” shows which Security Tokens are assigned to Miquel Delazes through his Security Role “Manufact/Stock Admin”.
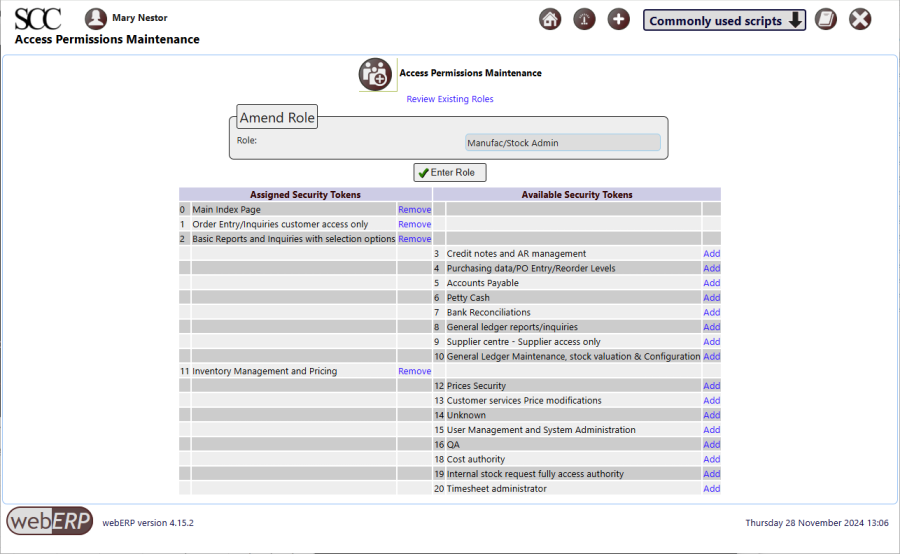
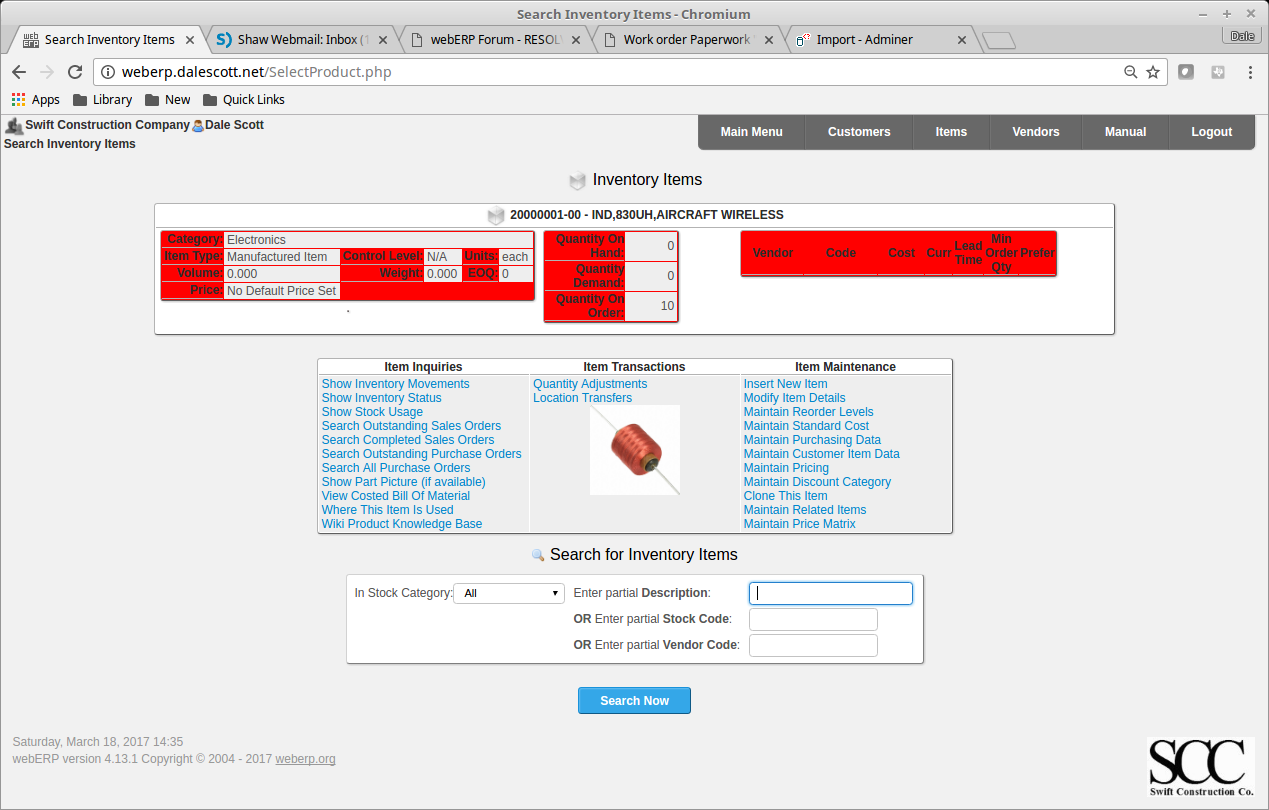
In his role as “Manufact/Stock Admin”, Miquel will need to search, create and edit Items, which is accomplished using the “SelectProduct.php” script.
E.g. [Main Menu > Inventory > Maintenance > Select an Item] and click [Seach Now].
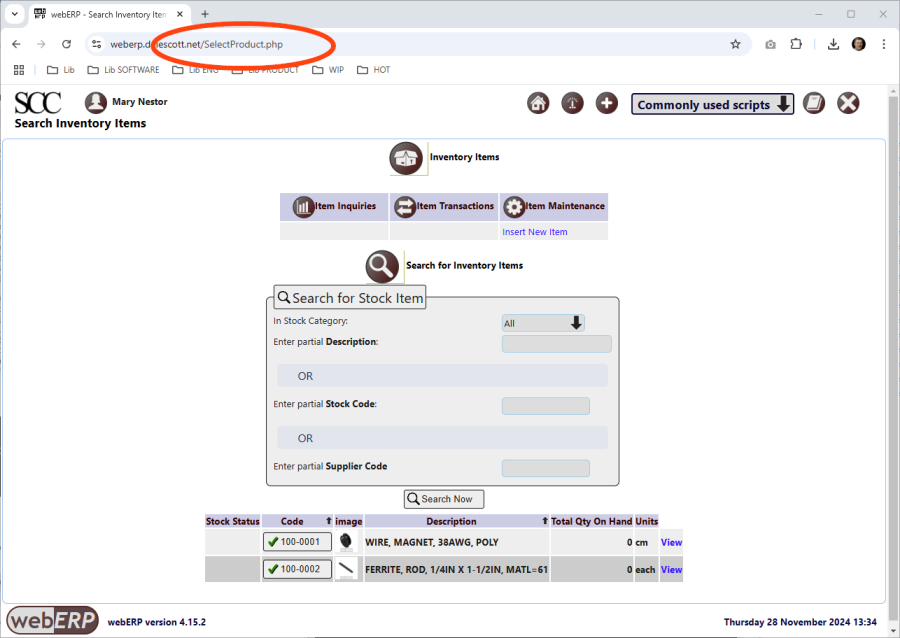
Access to the SelectProduct.php script is controlled by the Page Security Level.
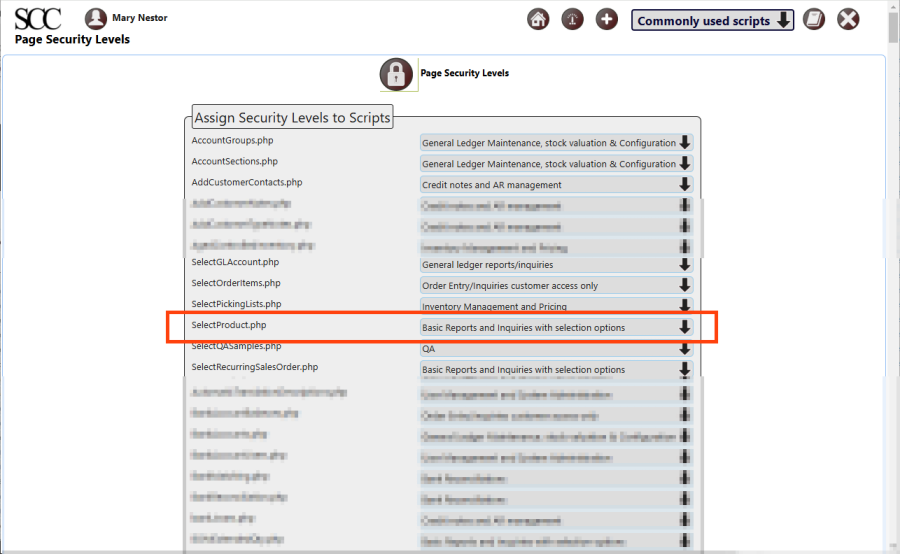
Page Security Levels
To view or edit the page security levels (aka script security levels), click [Main Menu > Setup > General > Page Security Settings].
It can be see that the SelectProduct.php script (aka page) has been assigned “Basic Reports and Inquirires with selection options”, which is assigned to the “Manufact/Stock Admin” security role assigned to Miquel as we saw previously.
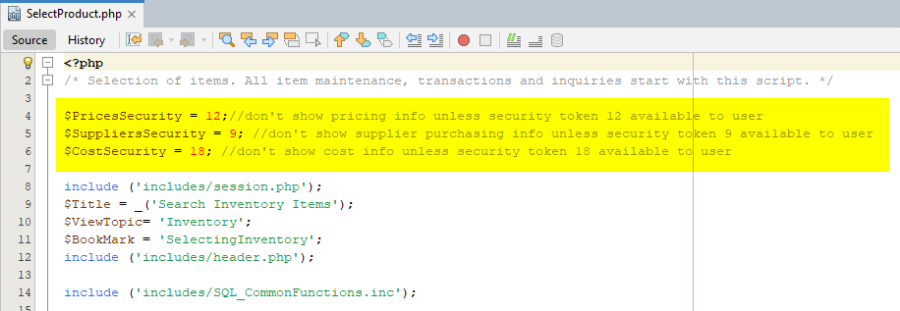
In-Script Security
In addition to Security Role / Security Token / Page Security Level system, be aware that scripts can further restrict access with in-script security.
For example, the SelectProduct.php script will only show pricing, supplier purchasing and cost information if the logged-in user is assigned Security Token 12 (Prices Security), Security Token 9 (Supplier centre – Supplier access only) or Security Token 18 (Cost authority).
User Miquel will not be shown pricing, supplier purchasing and cost information because his assigned “Manufact/Stock Admin” security role does not have these tokens.
Summary
The default (out-of-the-box) user permissions and security configuration will generally be sufficient to get you started. Eventually though you will want to create bespoke security roles and token assignments based on the structure, staff and relationships of your company.
Chapter 9 – Manufacturing
This chapter is a work in progress.
An ERP system offers numerous advantages for manufacturing operations, primarily by centralizing data and streamlining processes. It provides real-time visibility across the entire supply chain, from raw material procurement to finished goods delivery, enabling better inventory management and reducing lead times. Automation of repetitive tasks, such as production scheduling and order processing, significantly boosts efficiency and minimizes human error. Furthermore, by integrating financial, production, and sales data, ERP facilitates more accurate forecasting and data-driven decision-making, ultimately leading to cost reductions and improved profitability. This comprehensive integration fosters enhanced collaboration among departments, ensuring everyone works with consistent information and towards shared organizational goals.
Features of using webERP for manufacturing include:
- Efficiency. Items, Vendors, Work Orders, etc. are managed within one controlled system. Fix a problem once and it’s fixed everywhere.
- Visibility. A visible, trusted, change management process and a chain of truth.
- Scalable. Readily scales with users, items, vendors and orders, and adapts as your processes change over time.
The custom inductor in the Swift Construction Company’s Aircraft Wireless product will be used as an example. Related documentation will be stored in the Knowledge Base (optional).
Goal
- Create a Manufacturing Order for an assembly
- Automatically issue items on the BOM to the Manufacturing Order
- Move finished goods to stock and close the Manufacturing Order
Manufacturing Cycle
The general manufacturing cycle in webERP is:
- Enter a Work Order to manufacture an item according to its bill of materials (BOM).
- Receive the finished manufactured items (the output from the work order) into stock. Input items listed on the bill of materials to auto-issue input items will be transacted to the work order at this time.
- Issue any additional input items used in in the manufacturing process to the work order).
- Close the work order.
The item to be manufactured is item 100-0004, a custom electrical inductor, created in Chapter 3.2 – Create Items and BOMs in webERP.

The procedure will be:
- The Manufacturing Scheduler creates work order and assigns to assembly technician.
- The Manufacturing Technician:
- Prints work order and kits required input materials from stock room.
- Initials each input item quantity as removed from stock.
- Completes finished coils.
- Initials work order showing complete and returns to scheduler.
- The Manufacturing Scheduler receives the output items into the work order, causing input items to be transferred from stock and closes the work order.
TODO add swim-lane diagrams showing manufacturing process.
TODO add examples of documentation.
User Permissions
We will login as user “mnestor” (Mary Nestor), who is assigned the Administrator security role so it won’t be necessary to understand the inner workings of the webERP role-based user security scheme before actually working with webERP. The Administrator role has all the necessary permissions for most operations (except occassionally a user with the Accountant security role will be needed for finance related operations).
In actual use, it is important that each user has their own login with a password only they know. This allows who performed a transaction or operation to be identified after the fact for tracibility and can be especially important in regulated industries.
Default (out-of-the-box) security permissions will get you started but you should create bespoke security roles and token assignments based on the structure, staff and roles of your company.
Configuring user permissions is covered in more detail in the webERP User Permissions chapter.
Setup
TODO add setup unique to manufacturing.
Create Work Order
FOLLOWING CONTENT HAS NOT BEEN UPDATED TO webERP v5 (images and text refer to v4)
A work order essentially converts the list of raw material required to manufacture an item (the Bill of Materials, or BOM) into one or more outputs. The work order can be printed and used to kit the necessary raw materials, and also used as a traveller for the Work in Process (WIP).
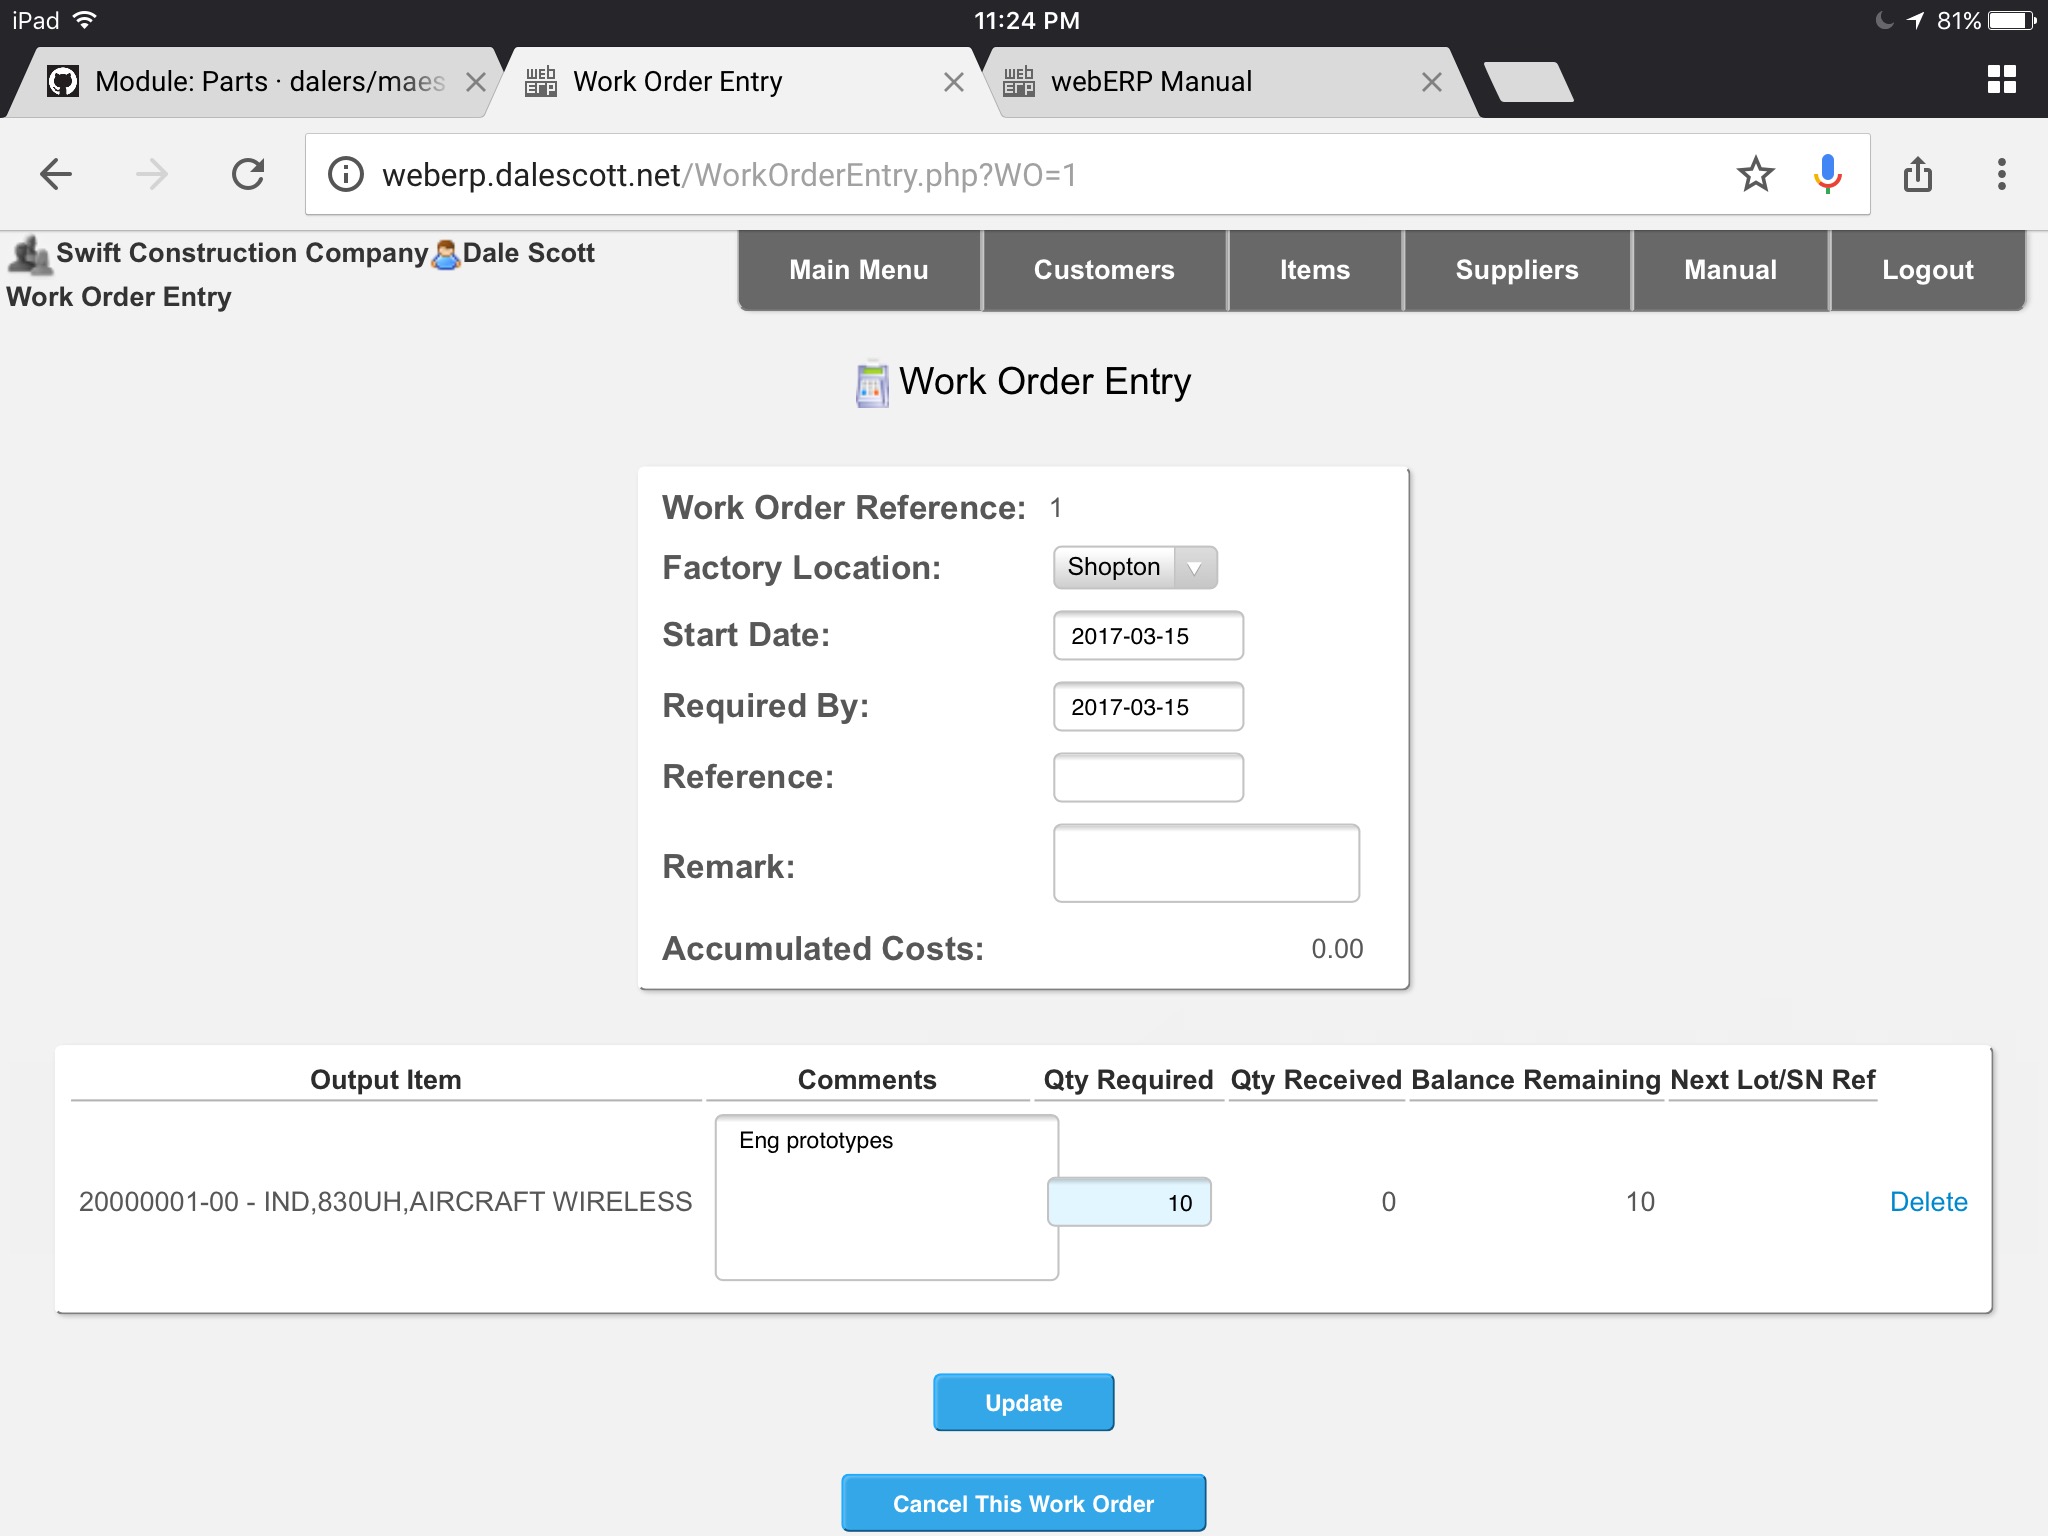
- Create a new work order.
- Enter optional Reference and Remark. TODO explain why
- Search & select output item 20000001-00. Update.
- Enter Qty 10 and comment for output 20000001-00. Update.
The work order can be printed and signed as record of kitting, and also as a record of additional input items to enter before closing the work order. A printed copy of the work order often travels with the WIP as identification (also called a traveler). Labels can also be printed for later attaching to the manufactured items.
[Main Menu > Manufacturing > Transactions > Work Order Entry]
If you search for work orders you will see that the new work work is now recorded in the system.
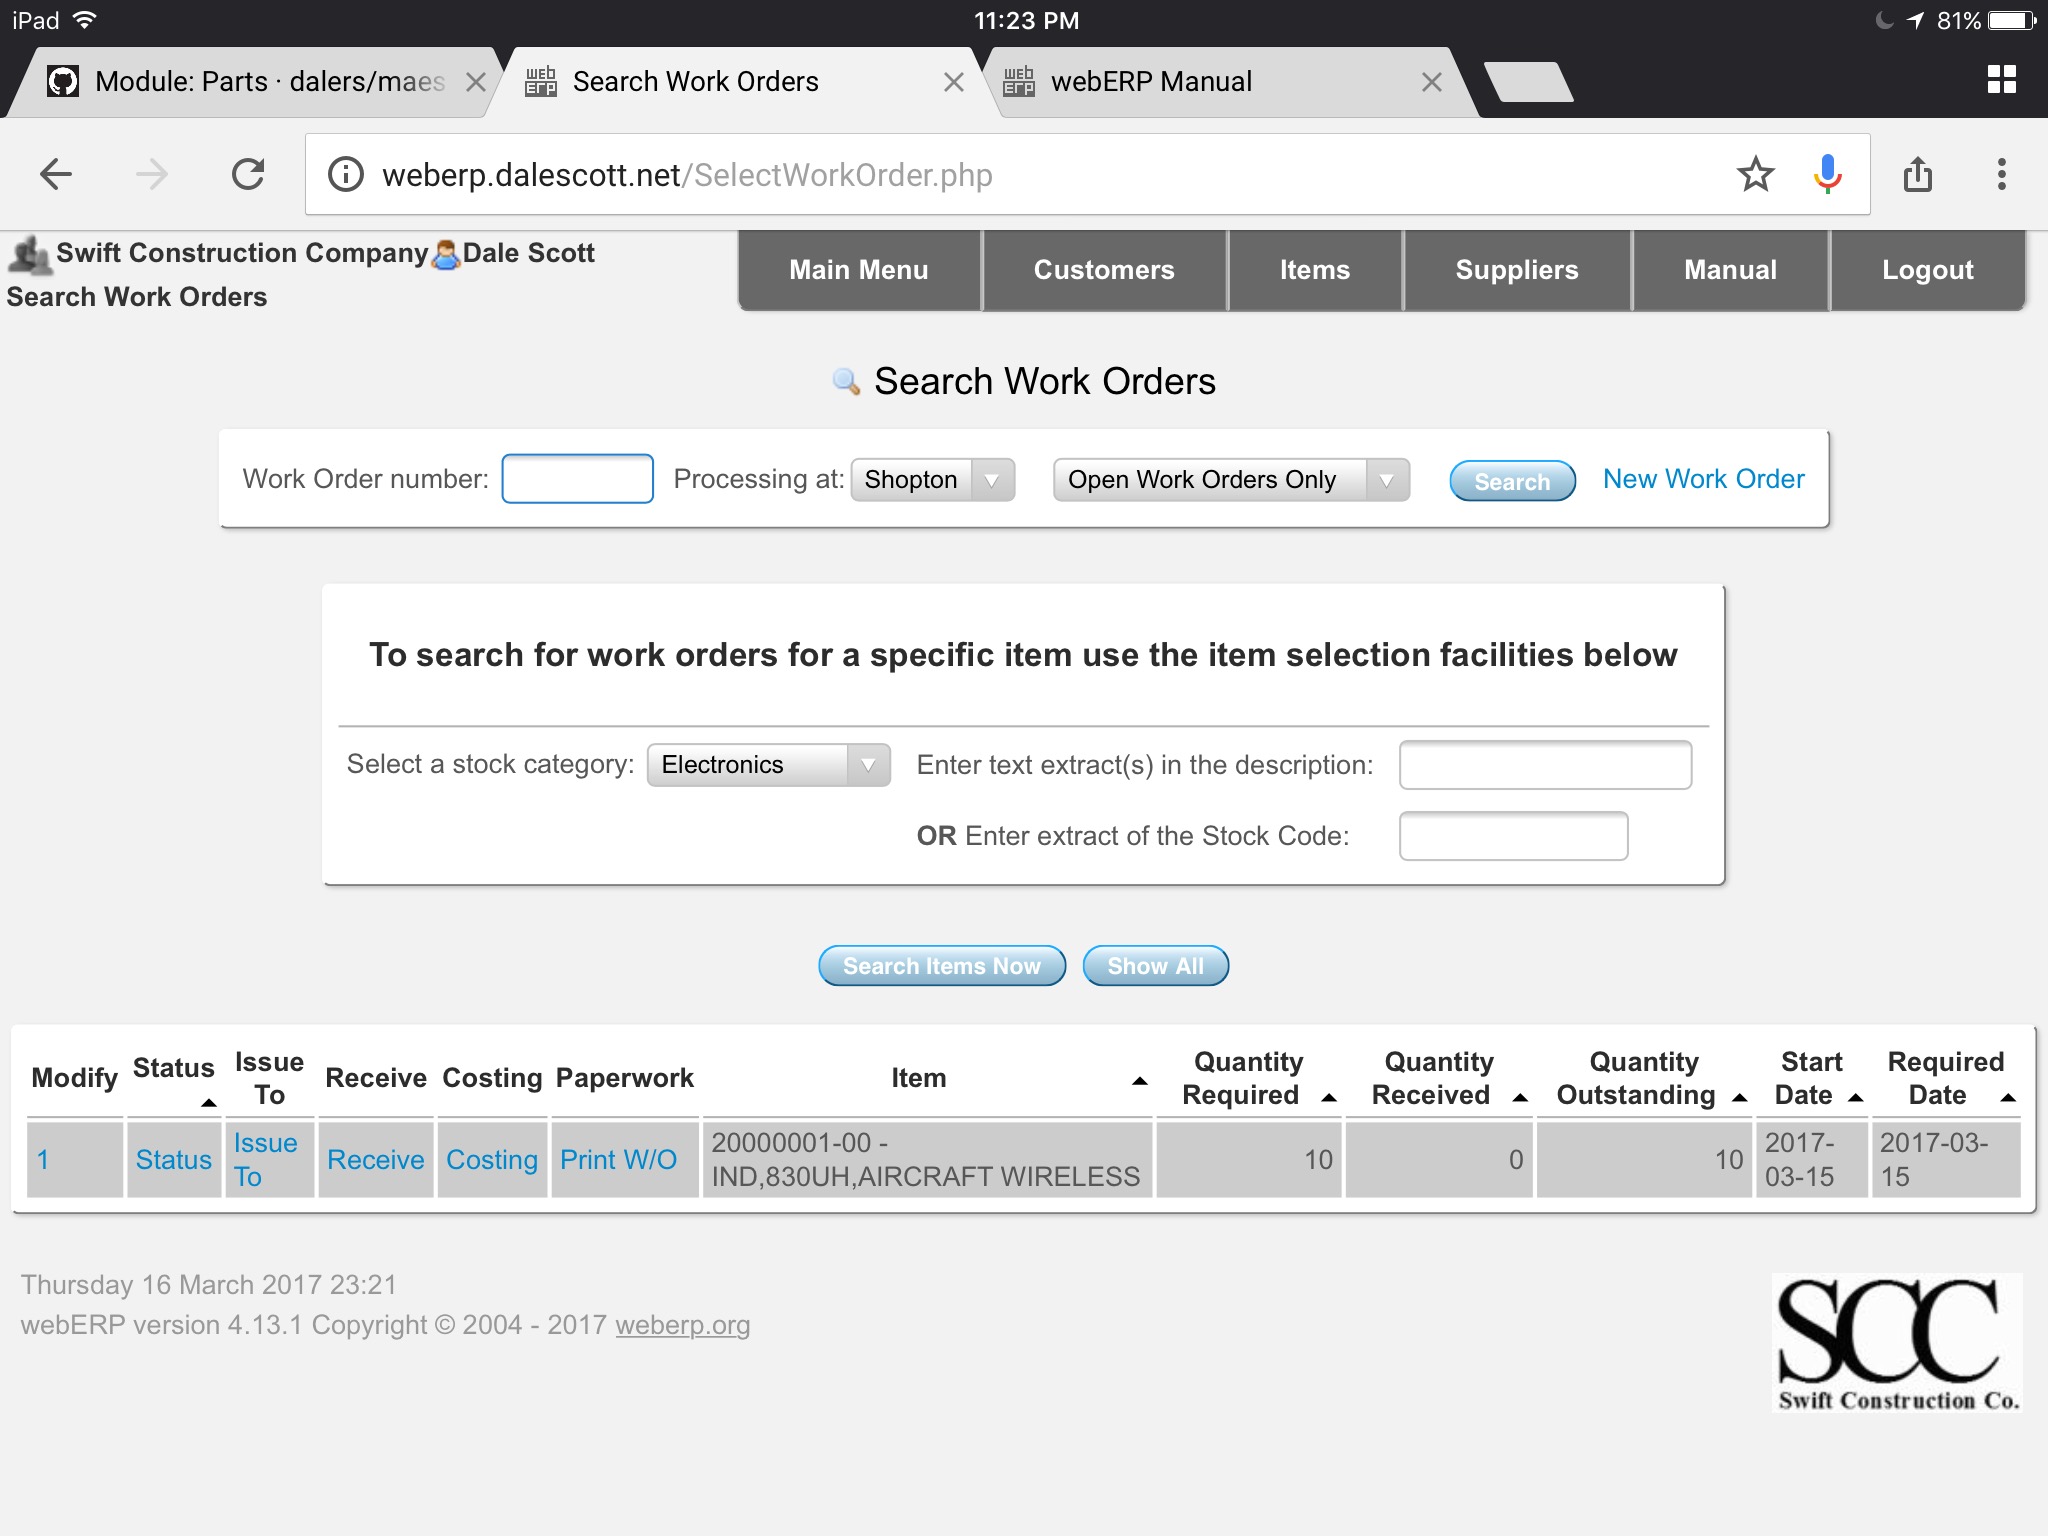
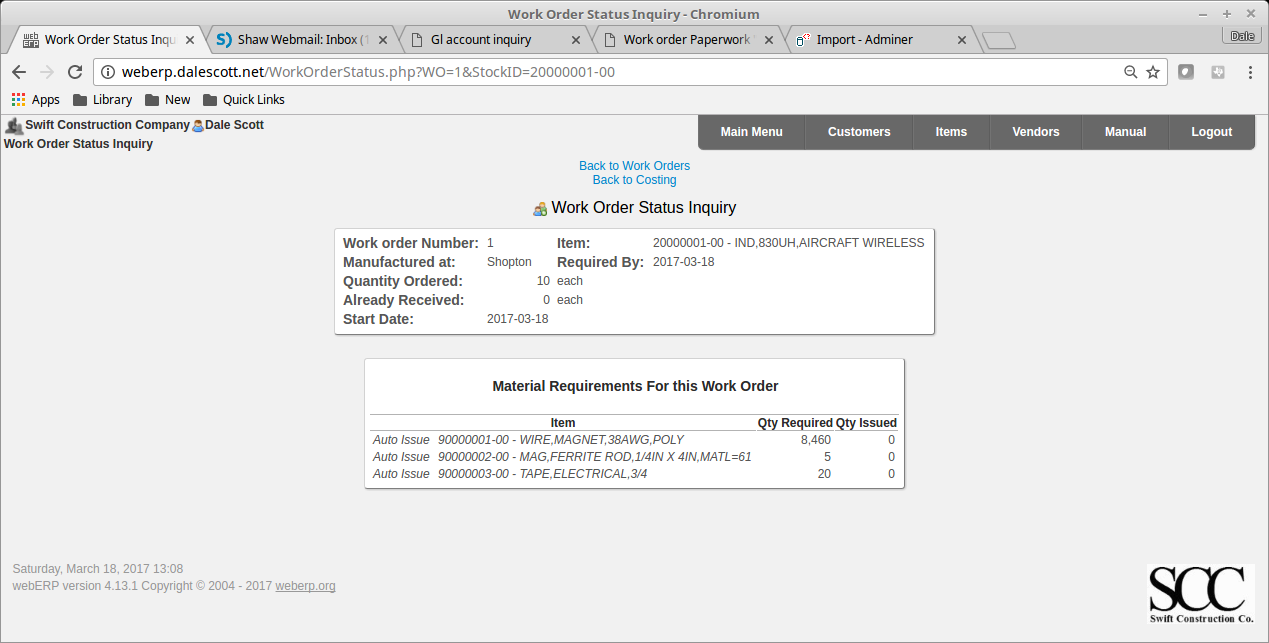
The work order status shows demand for the raw materials needed to manufacture the inductor, which indicates they have not been issued.
You will also see that there is qty 10 of item 100-0004 on order.
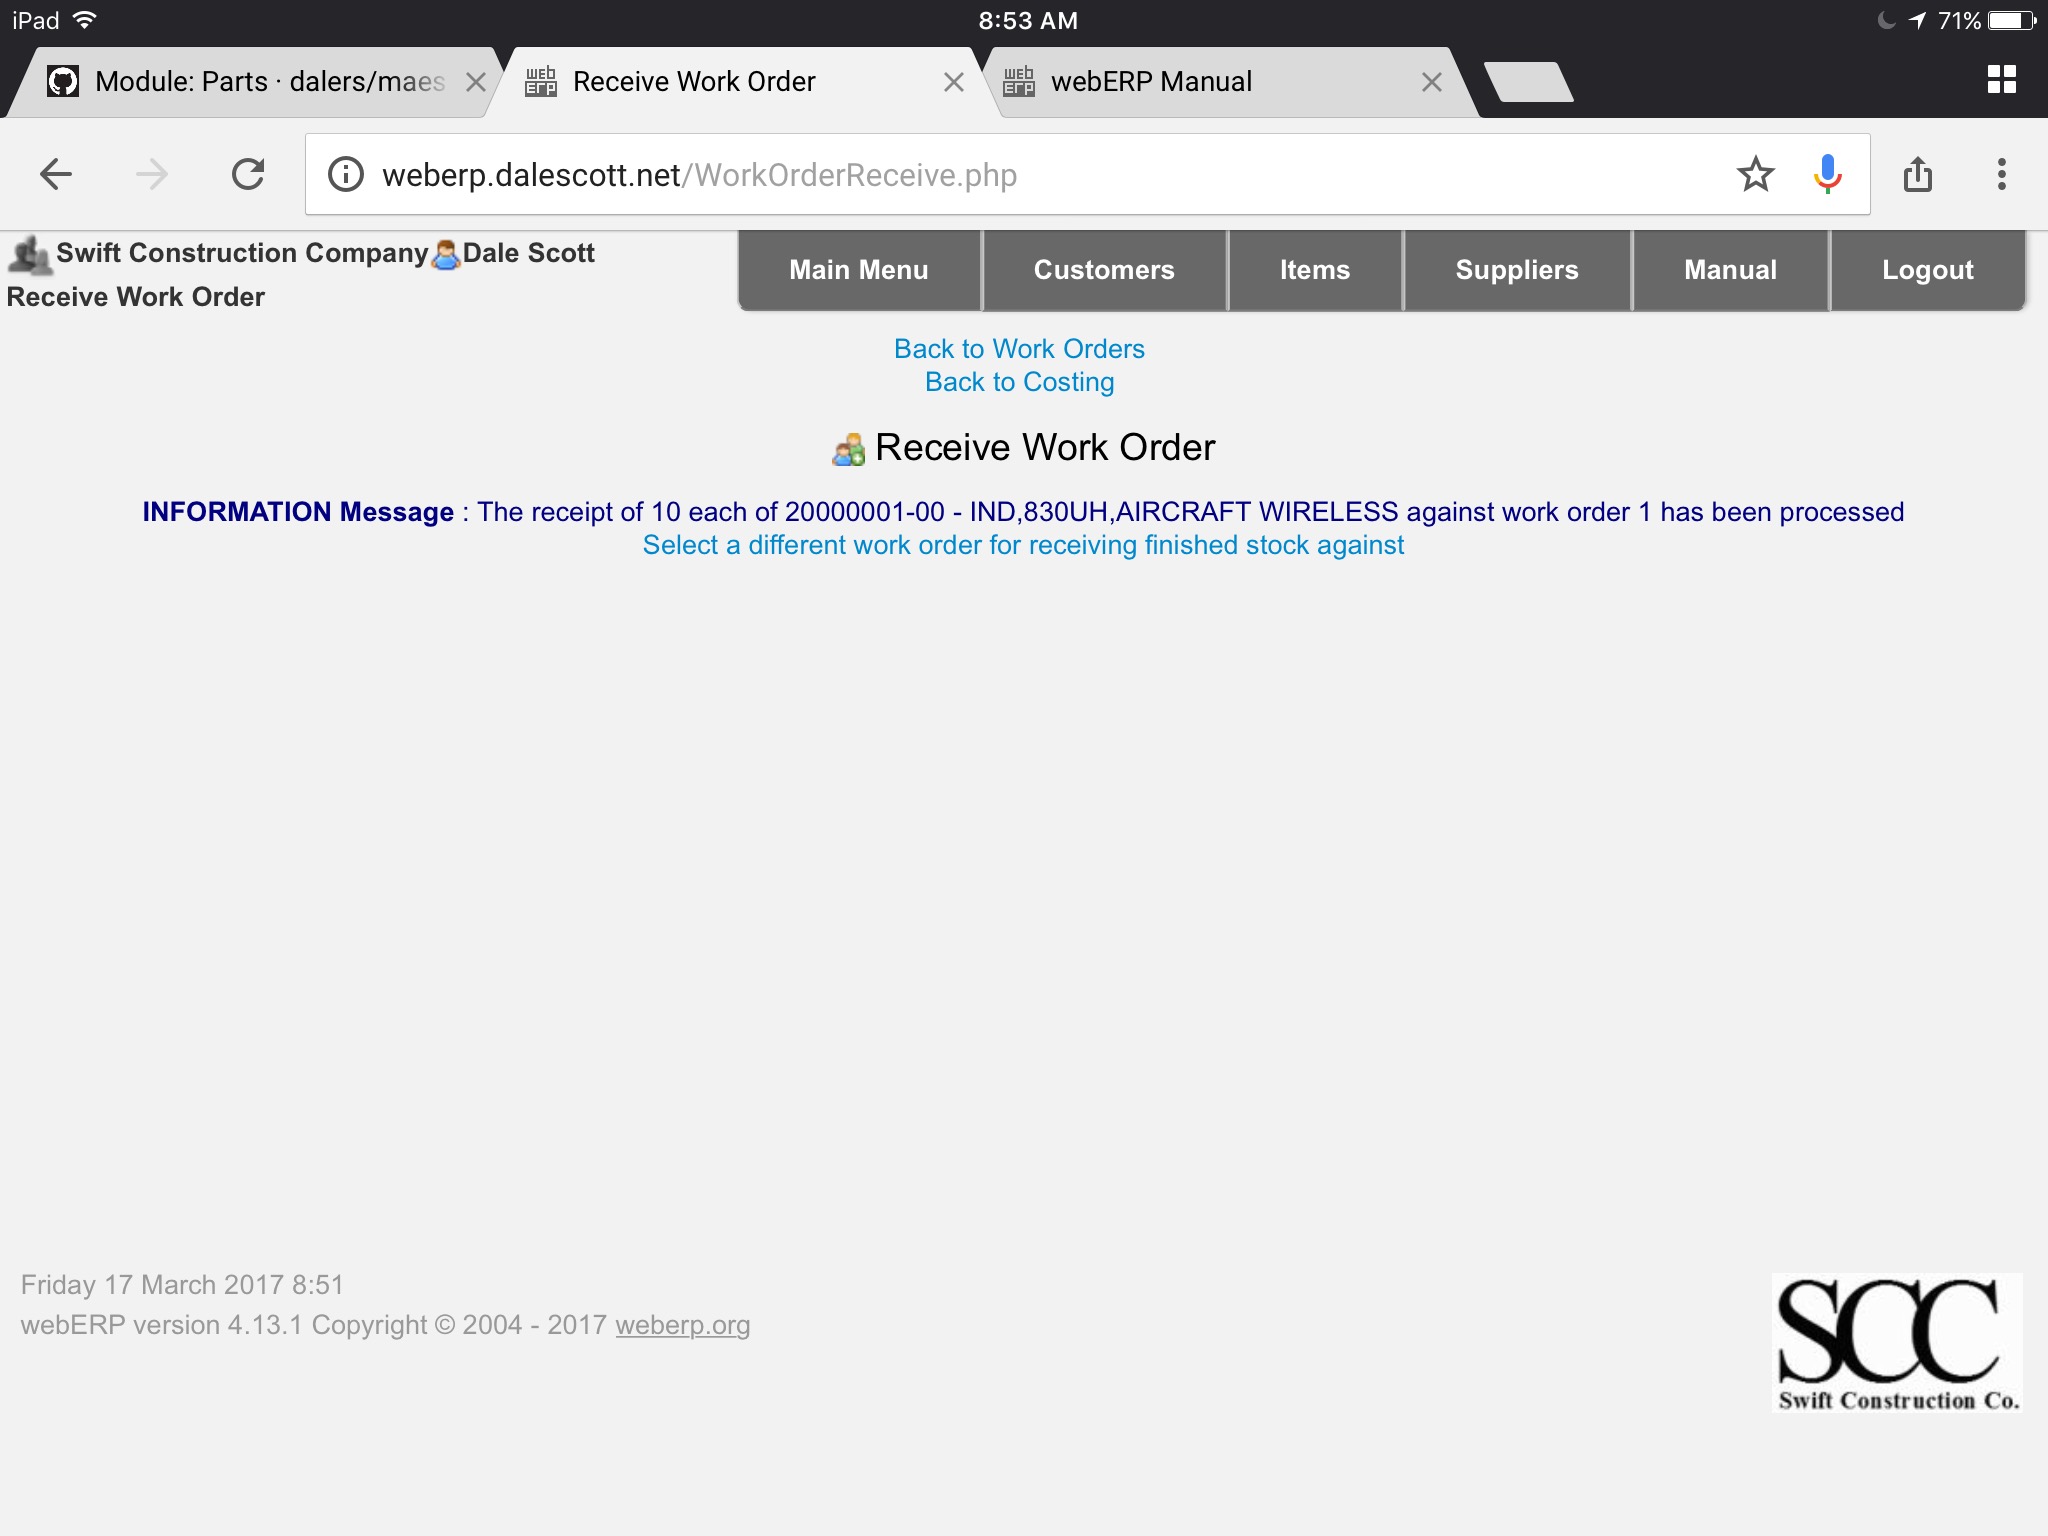
Receive Output Goods
When the output items have been manufactured they are received against the work order. For simplicity I will assume the manufacturing process had 100% yield, with no waste and all the manufactured items met requirements.
Items listed on the BOM as auto-issue will issue to the work order at this time.
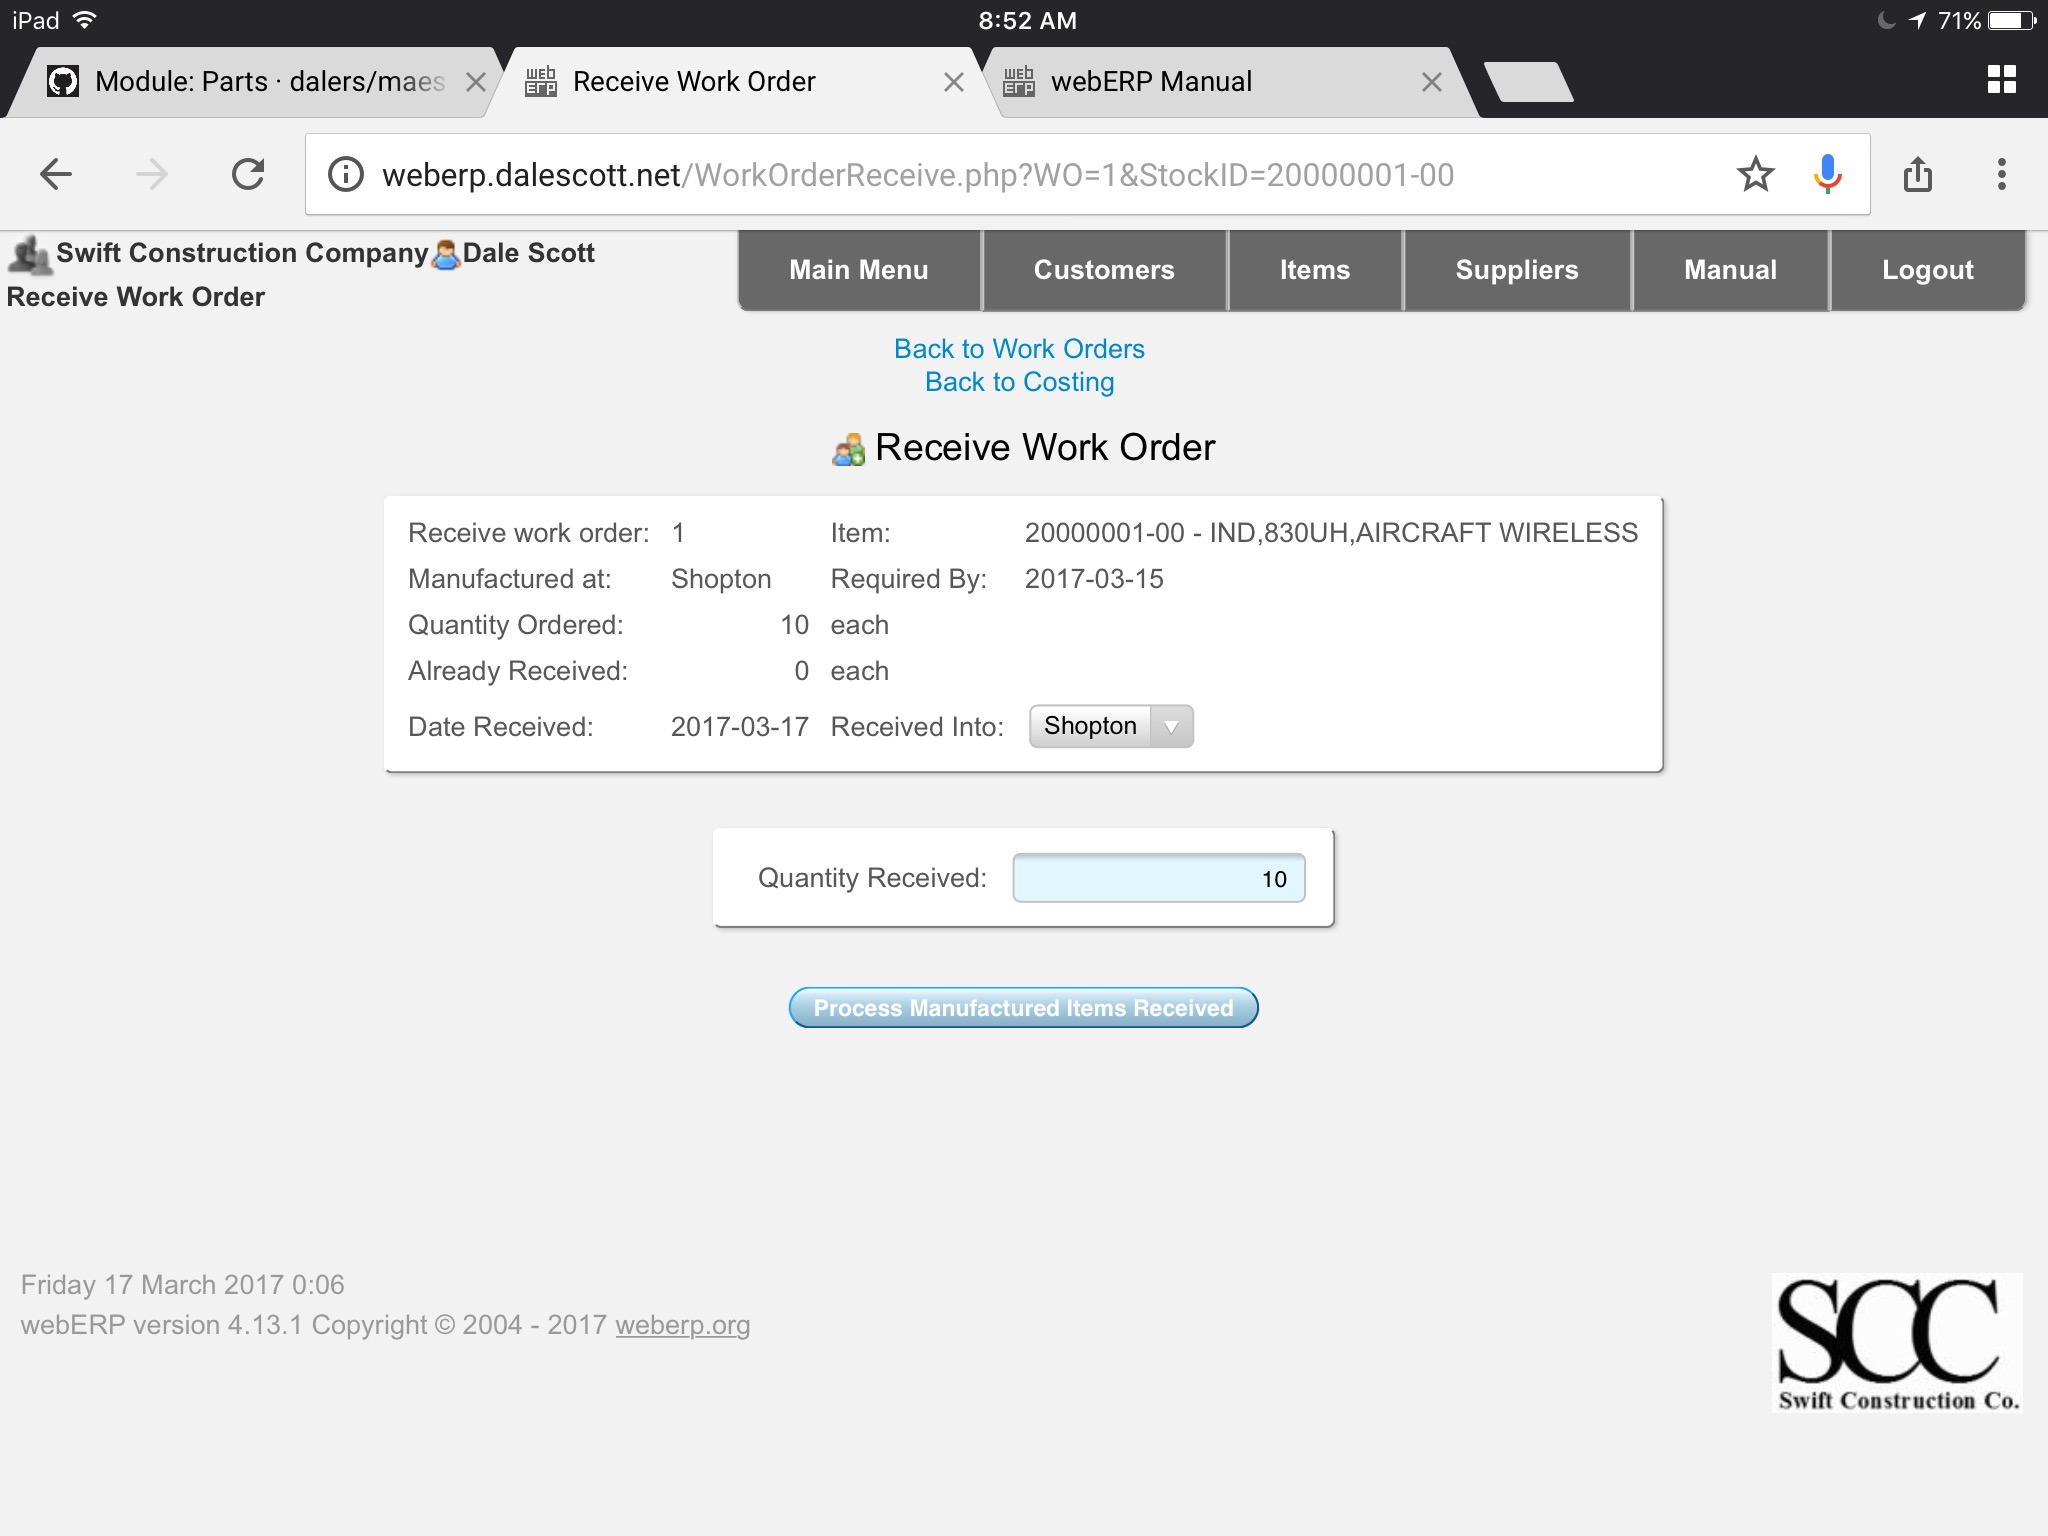
Process Manufactured Items Received
TODO describe procedure.
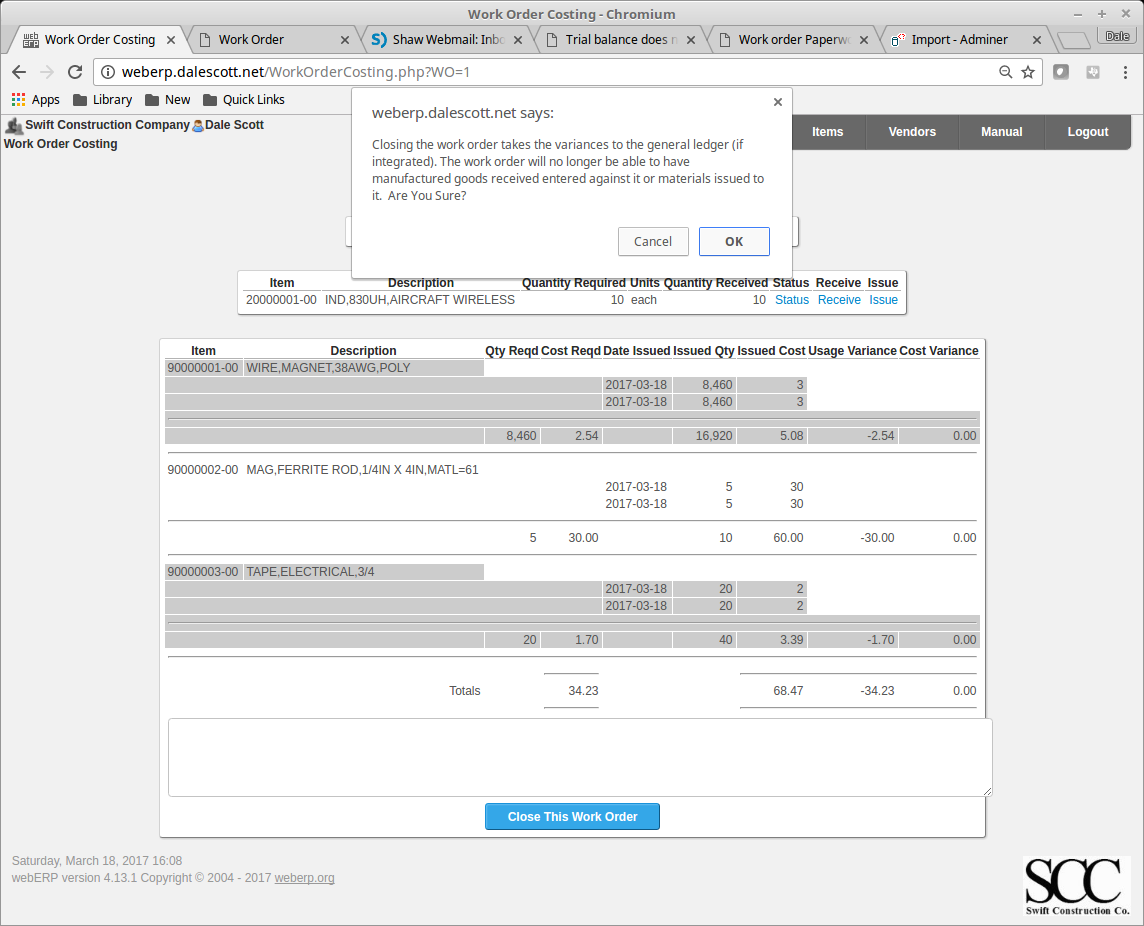
Close Work Order
Close the work order after all raw material has been issued to the work order and all manufactured items have been received against the work order. Review the work order costing,
[Main Menu > Manufacturing > Transactions > Select a Work Order > Select > Costing]
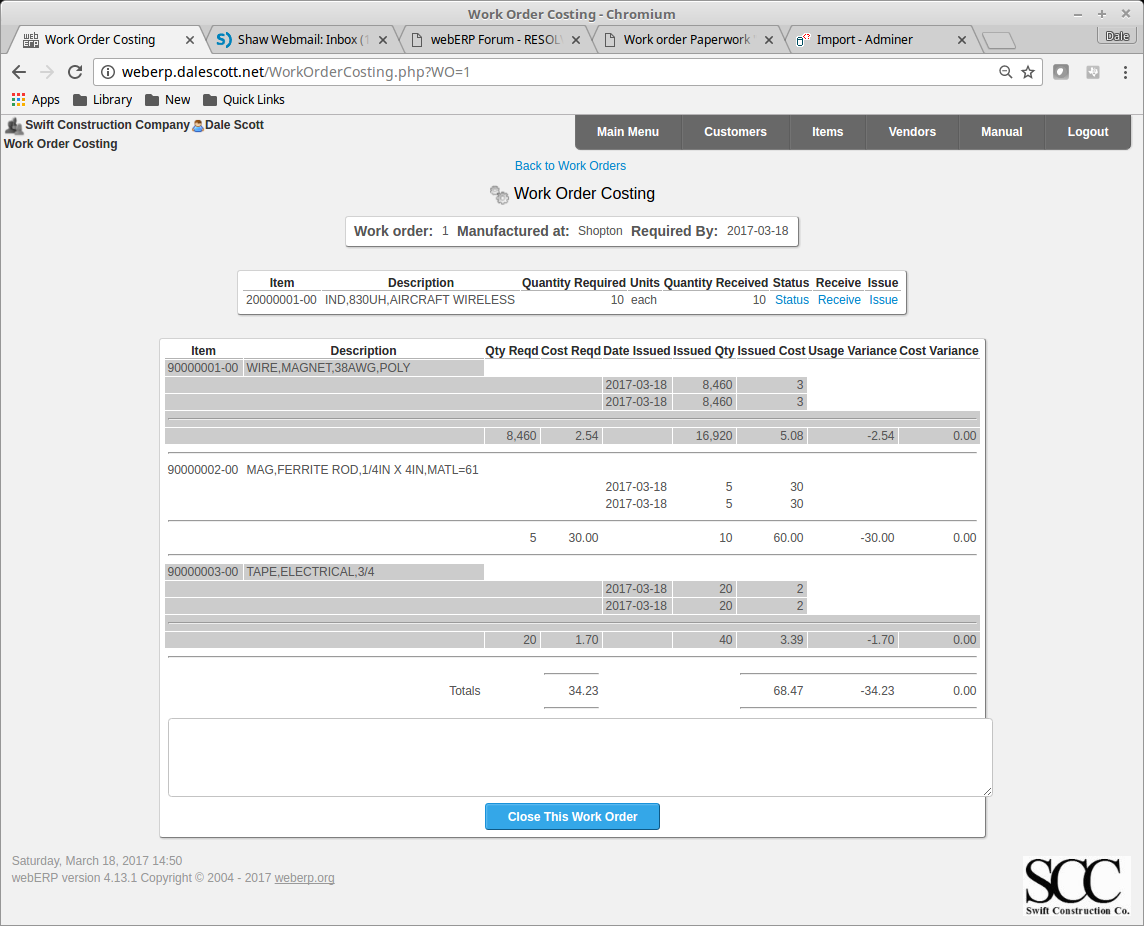
and close the work order.
Summary
This completes a basic introduction into the manufacturing process using webERP.